
Florida summertime brings to mind the sights, smells and tastes of all sorts of fresh produce. From juicy berries and plump tomatoes to spicy peppers and crisp okra, we Pensacolians have the ability to grow a variety of fruits, veggies and herbs throughout the summer months. Our summer harvests cannot last forever, though. Rather than letting excess produce rot away, consider preserving the surplus by canning!
Canning leftovers from your summer harvest can help you get the most out of your garden, allowing for the year-round enjoyment of homegrown produce, while also promoting sustainability by minimizing waste and maximizing savings. We spoke with Alisa Ansley, owner of Murder Creek Canning Company, to learn more about canning safety as well as some of the most common canning methods. Ansley has over 50 years of canning experience and sells her own canned goods at the Palafox Market.
Canning Safety
Safety is the most important aspect of canning to consider when starting out with at-home food preservation. When dealing with anything food- or preservation-related, food-borne illness and spoiling must be taken into consideration. If bacteria exists on your canning jars before you seal them, the food can spoil, creating both a waste of time and the chance of sickness after consumption.
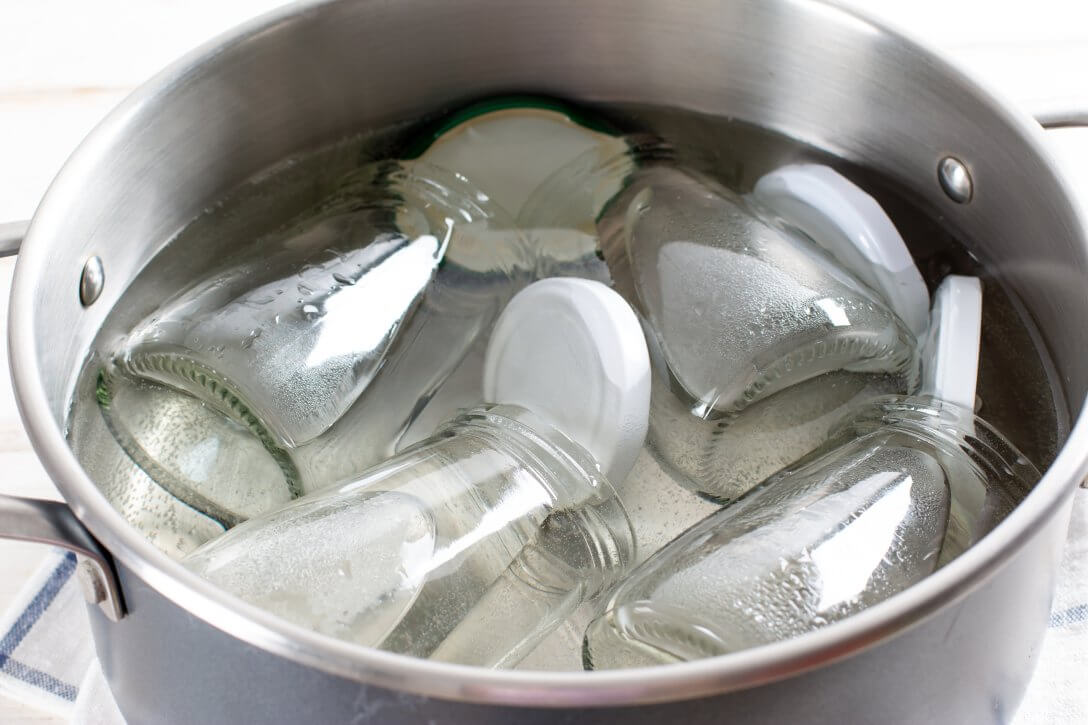
“The most important part of doing any canning or preserving is cleanliness,” Ansley explained. “Your jars need to be sterilized before you ever use them. I sterilize mine with boiling water. Some people use the sterilization mode on their dishwasher, but I’m a little old school; I want to bring them to a boil in boiling water and make sure that they’re thoroughly sterile before I put my product in them.”
It is also very important to know the types of foods that can and cannot be canned safely at home. Products like jams and pickles can be canned safely, whereas products like milk or butter cannot be. Many resources can help with learning about canning safety, such as the USDA.
“The USDA sometimes offers beginning canning classes. They’re a great resource if you’re not sure if something can be safely canned, because not everything can be safely canned. If it’s a very dense food, there’s a possibility that the internal temperature in the center of that product that you are canning won’t get hot enough to destroy all potential bacteria. The USDA can tell you whether or not something can be safely canned,” Ansley explained.
Even after safely canning your produce, it is important to consume it within its shelf-life. Ansley said that if your products are canned correctly, they should last unopened in the pantry for up to 18 months. However, much like grocery store-bought jams and pickles, once a preserved product is opened it should be stored in the fridge.
Water Bath Canning
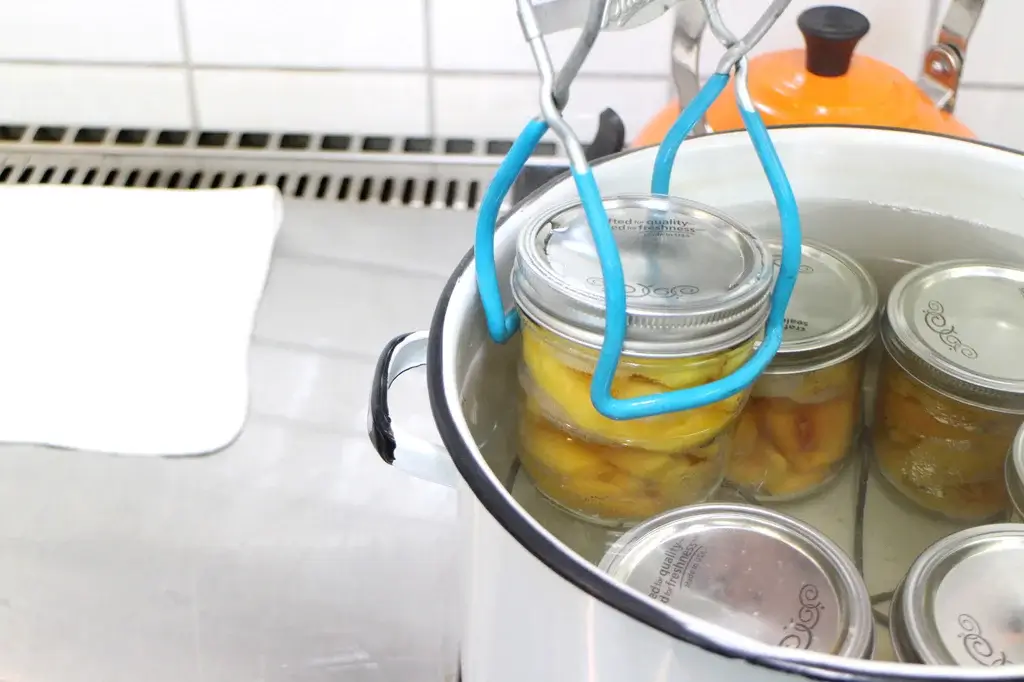
The most popular type of at-home canning is water bath canning. This method involves processing your jarred goods in boiling water until a vacuum seal forms. The process begins by placing your food items into sterilized jars, leaving about an inch of space at the top of the jar. Wipe off any spillage or excess on the rims of the jars with a clean wet cloth. Then, it is time to seal the jars. “Place your lids and your rings on. You don’t want to put your rings on too tight because you want a vacuum to form, so you’re just going to finger-tighten the rings, ” Ansley suggested.
After preparing and sealing the jars, place them onto a rack in a pot of boiling water, making sure the tops of the jars are covered with at least an inch of water. The length of time that the jars should sit in the boiling water varies depending upon the recipe. Once the jars have processed the specific amount of time, they can be removed and placed on a surface in a room temperature space for 24 hours. As the jars cool and acclimate to the temperature, a vacuum seal forms. This seal allows the food to stay preserved and safe until the seal is broken. After setting out for 24 hours, your preserved goods are ready to be stored away or consumed.
When water bath canning, the acidity of the product that you are canning is important. Acidity is needed for this process because it prevents the growth of harmful bacteria that cause illnesses and poisoning like botulism. High acidity levels create an environment in which these bacteria cannot survive. Foods like tomatoes, berries and pickles are commonly preserved using this process.
Steam Canning

Steam canning is an at-home canning process that is similar to water bath canning in the way that it requires using a stovetop and boiling water, but the processes are also quite different. The main difference between these two canning methods is that with water bath canning, the jars are submerged in water, but with steam canning, the jars only come into contact with steam from a small amount of water.
Like water bath canning, steam canning is suitable for foods with higher acidity levels. Steam canning also involves the same beginning steps as water bath canning—filling your jars, wiping the rims and sealing the lids. The next step of the steam canning process is different, as the equipment for steam canning is different. Steam canners have a shallow tray in the bottom with a rack that you can place your jars on. After preparing your jars and sealing the lids, place the jars on this rack. Then, place a small amount of water at the bottom of the tray, turn on the heat until you see steam and then cover with the lid. Your product should steam for as long as the recipe recommends.
The steam will circulate around the jars, heating the product. Once the recommended amount of processing time is complete, the jars can be removed and set aside to cool down and come to room temperature. Much like water bath canning, as the jars cool, a vacuum seal forms to preserve the food inside.
Pressure Canning
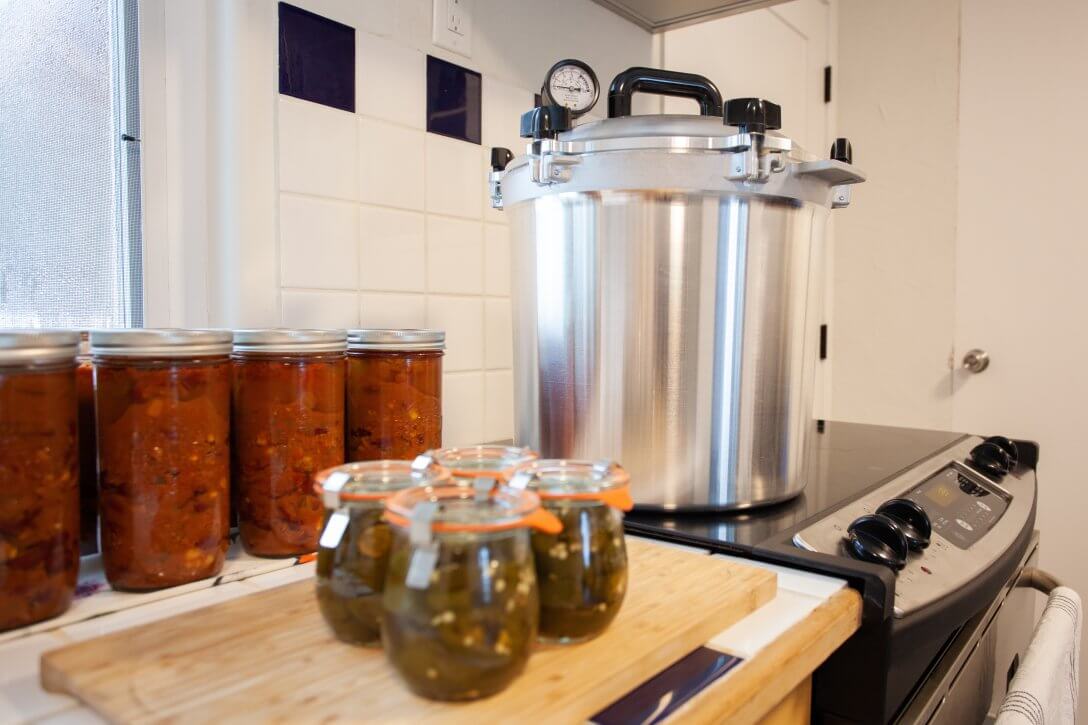
In contrast with water bath and steam canning, pressure canning is a safe and effective way to preserve lower-acidity foods. Foods like low-acid vegetables, meats and soups are great candidates for pressure canning, because in order to be safe, they require higher temperatures than what water bath or steam canning provides. Pressure canning utilizes high pressure and heat that ensure the harmful bacteria is killed.
Once your jars are filled and sealed like in the previous processes, place the jars inside the pressure canner with a small amount of water at the bottom. Then, latch the lid to the canner and build the pressure. The amount of pressure utilized depends on your altitude and the particular recipe.
“In my area with my altitude, I add 10 pounds of pressure to everything I do,” Ansley explained. “When you latch your lid down, you’re going to build the pressure inside that canister until you can see a small stream of steam being released. Then you have a weight that you would place on the 10-pound setting. So, if at any point the pressure builds above 10 pounds, it’s going to automatically release pressure.”
After the pressure is maintained for the recommended processing time, turn off the heat and let the pressure go down in the canner. Do not turn the heat off and open the canner immediately, as it can cause burns and make the lids pop off the jars, defeating the purpose of the canning process. Once the canner is cooled and the pressure is back at zero, you can remove the jars and continue to let them cool. As the jars cool, a vacuum seal forms, preserving the food.
Getting Started
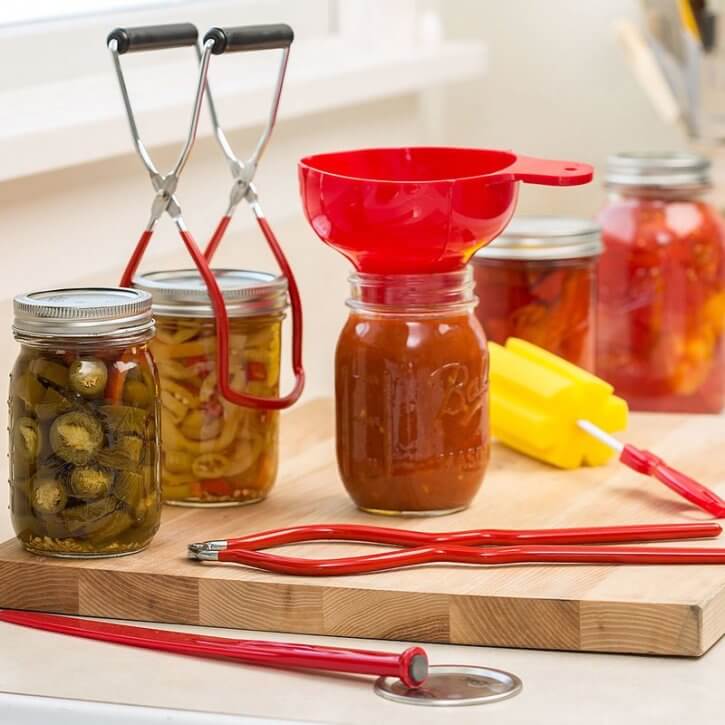
After getting a glimpse into the wonderful world of at-home canning, you may not know where to start. Ansley suggests starting simple, “I would recommend starting simple with jams and jellies. You can buy a simple water bath canning kit at a retail store for less than $25 or $30. I would recommend starting with water bath canning as there are a lot of different things that you can water bath can to find out whether or not you like it.”
There are many additional resources available for those looking to get started with at-home canning. “A wonderful resource is the Ball Blue Book of Canning; it provides great insight,” Ansley said. “It is great for people who are new and have never done it before. It lays everything out very clearly and it shows you the times that you need to process each item based on the size of the jar you’re putting in or what the contents are.”
Canning can be extremely rewarding, but safety should always be considered first. If you find yourself canning and have a question or need some help, be sure to utilize the USDA’s resources to understand the ins and outs of safe at-home canning. For the USDA’s Complete Guide to Home Canning, visit nifa.usda.gov/about-nifa/blogs/usdas-completeguide-home-canning.